Schedule production runs
Open the scheduling dialog to assign routing templates, customize operations, and create work orders for parts on an order.
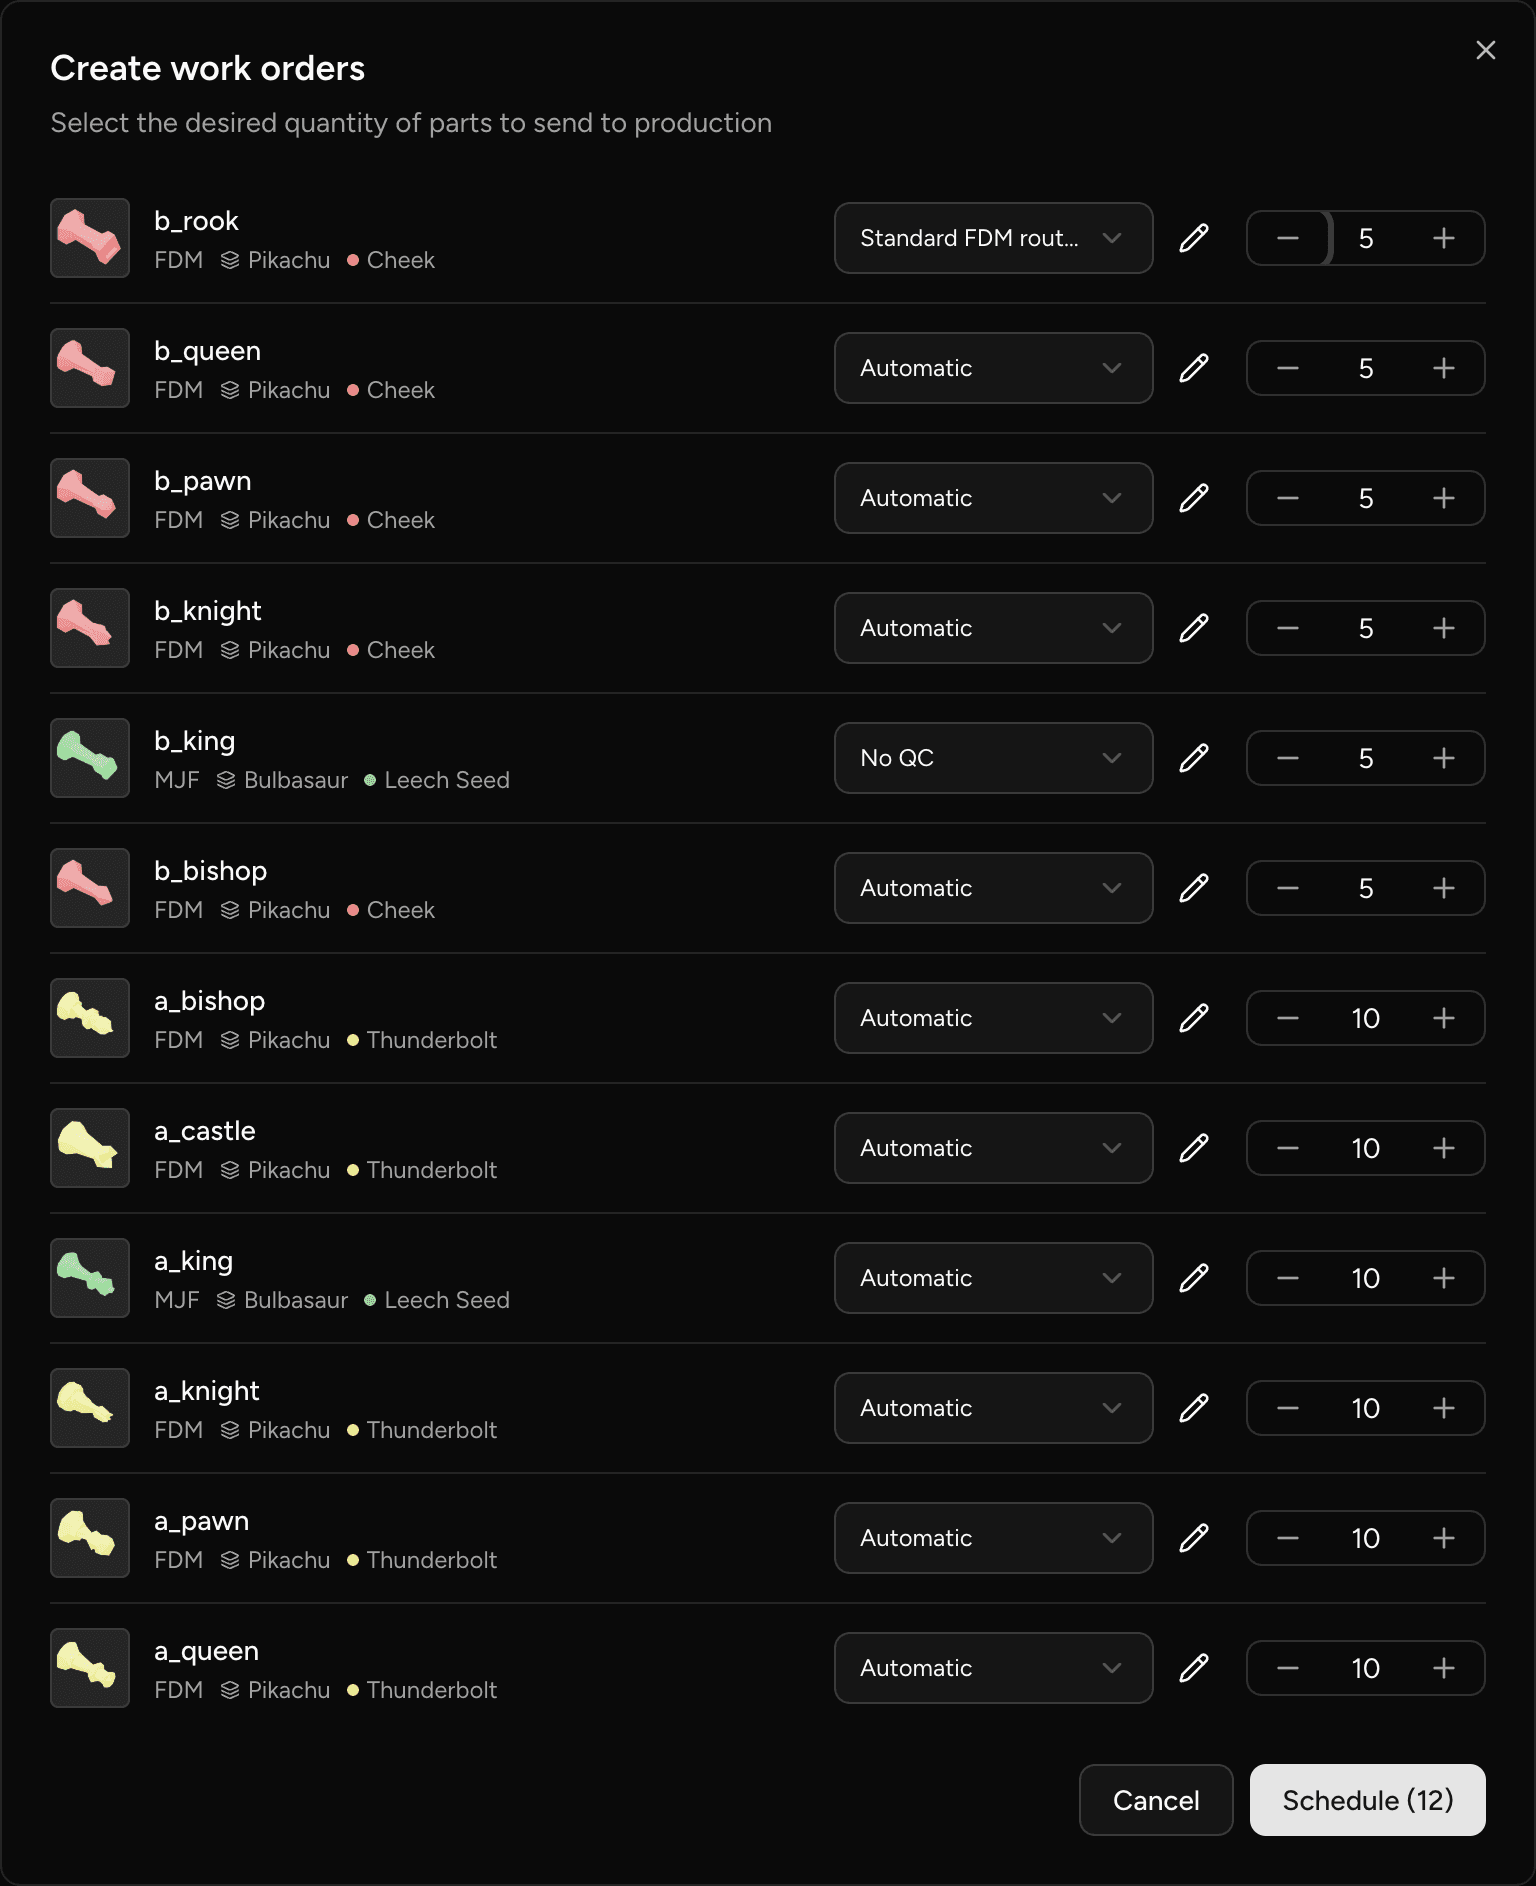
When you're ready to move parts into production, the scheduling dialog lets you set quantities and choose a routing for each part — all at once.
Open the scheduling dialog
- Open an order and navigate to the Production tab.
- Select to open the scheduling dialog.
Each row in the dialog represents one part on the order. For every row you can set a quantity and choose a routing template.
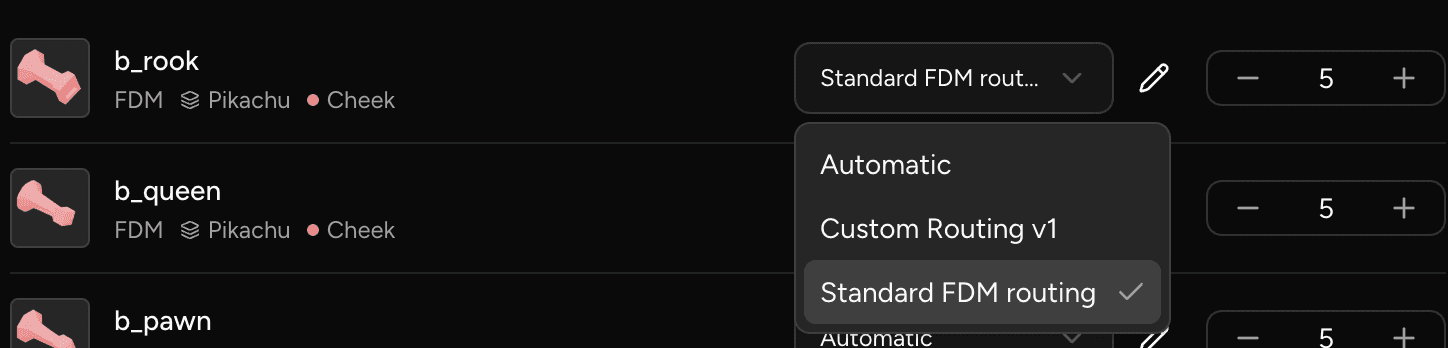
Choose a routing for each part
The routing template dropdown on each row controls which operations the work order follows. The options are:
- Automatic — the system derives the routing from your current process configuration. No template authoring required. Any operation you add to your process in the future will automatically appear on the next run for that part.
- Any routing template authored for the part's specification.
ℹ️ For a part with no designated default routing template, the dropdown defaults to Automatic. 👉 Manage routing templates
Customize a single run's routing
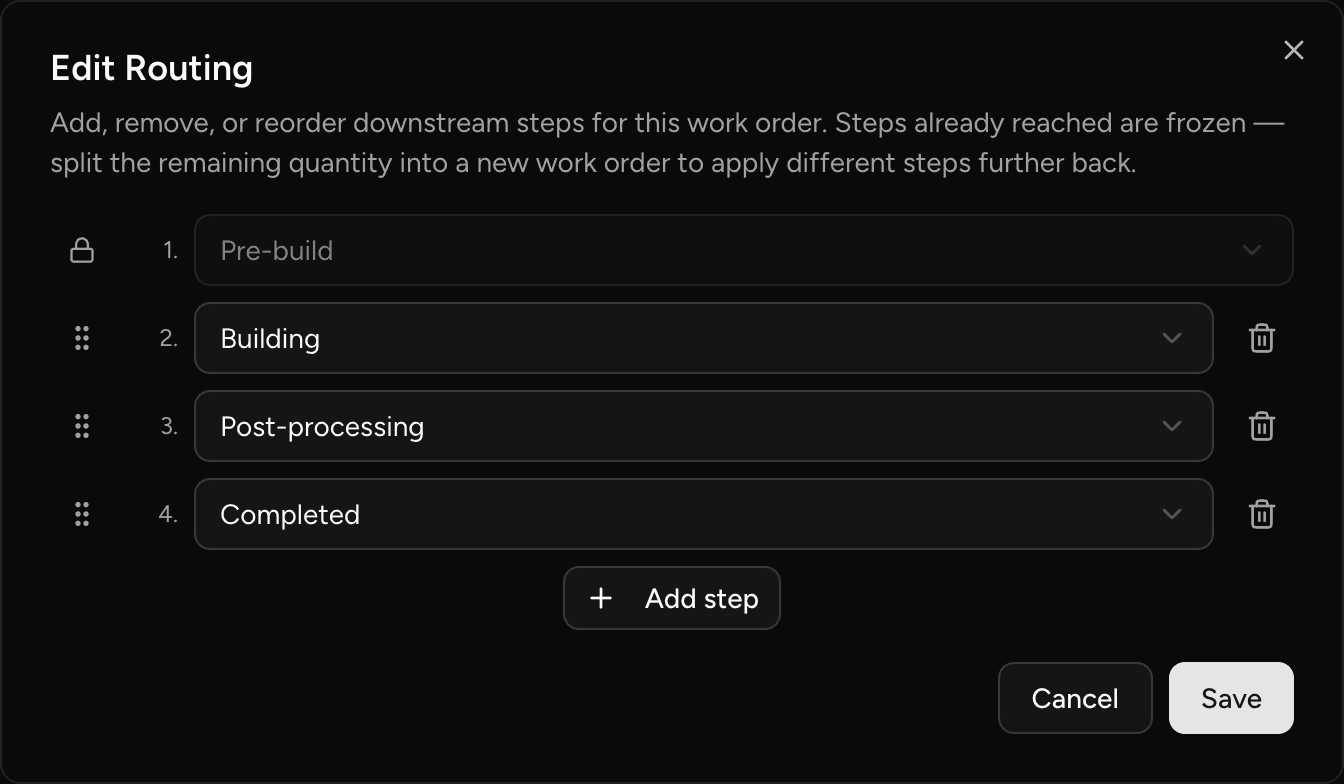
To adjust the operations for one specific work order without creating or changing a routing template, use the edit icon on that row to open the Edit routing steps editor, where you can add, remove, or reorder the operations for this run only.
When a row's routing has been customized this way, an Edited badge appears on it to indicate the run will follow a different routing than the selected template. Other parts and other runs are not affected.
💡 After customizing, select Save as routing template inside the editor, enter a Template name, and select Save template to save those operations as a reusable template on the part specification for future runs.
![]()
Confirm and create work orders
Once quantities and routings look correct, select Schedule to create a work order for each row. Parts land at the first operation of their routing immediately.
⚠️ Rows with a quantity of zero are skipped — no work order is created for that part.
Add another run for a part
To schedule an additional production run for a part that already has a work order, open the scheduling dialog again from the Production tab and submit a new row for that part. Each submission creates a separate work order with its own independent routing and balance tracking — existing runs are not affected.
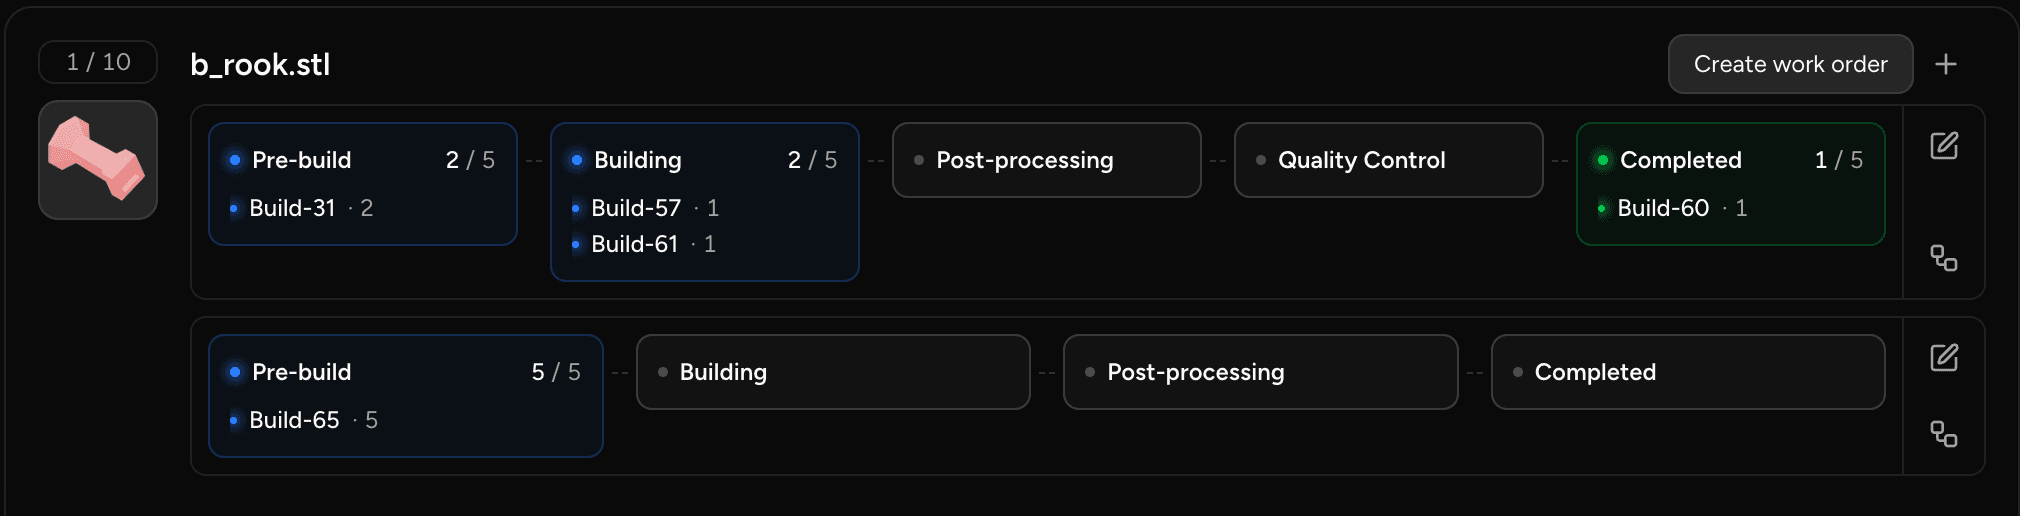
Edit one run's routing after creation
To change the operations on a single work order after it has been created:
- On the Production tab, locate the work order card for that part.
- Use the Edit Routing action on the card.
Only operations the run hasn't reached yet can be edited — steps already completed are frozen and show a lock icon. Changes apply to that work order only; other runs for the same part keep their own routing snapshots.
ℹ️ Existing work orders are unaffected by later changes to a routing template or to the part's process configuration.
Update an order's status when production begins
It's a good idea to update an order's status to indicate that production has begun once a work order has been created. This can be automatically achieved by:
- Locating the "Work order creation status" option under General settings.
- Selecting the target status to apply when the first work order has been created.
Orders will only move into this target status if it's not already in that status and if there are no prior work orders for any parts in that order.
Last updated on
Manage routing templates
Create, approve, and manage routing templates on a part specification to control how future production runs are routed through your shop.
Routing template approval
The 'Require approved routing templates' operator setting gates production scheduling behind an approval step, preventing unapproved routings from reaching the shop floor.