Manage and edit orders
Learn how to manage and edit orders in the Phasio manufacturing platform
Once you create a new order, you can manage it throughout your production process.
On the Orders > Board, you can move orders between columns by dragging and dropping. This instantly updates the order’s status and communicates progress to your team and customers.
View order details
From the Order Board or Orders List, click an Order ID to open the detailed view for that order.
The order view includes:
- Part(s) Ordered: Full specifications, dimensions, pricing, and quantities of all confirmed parts.
- Customer: Contact details and tax status information.
- Resend Order Confirmation: Click to resend the confirmation to the customer’s preferred communication channel.
- Accounting: Purchase Order (PO) ID linked to the order.
- Payment: Subtotal and tax breakdown.
- Billing Address: Customer's billing address.
- Download Estimate: Export quote summary as a PDF.
- Download Invoice: Export final invoice as a PDF.
Additional options:
- Download Part Files: Download files in available formats (e.g., STL, CAD).
- Download Traveller Sheet: Export a PDF traveller sheet for internal production tracking.
Edit order details
What if the customer needs to change a part or price?
To make changes (e.g., update a part file or adjust pricing), follow these steps:
- Archive the current order.
- Create a new order with the updated details and revised pricing.
⚠️ Archiving an order does not trigger a refund. Refunds must be processed manually through Stripe, PayPal, or your selected payment provider.
Communicate with customers
Phasio supports in-platform messaging so you can communicate directly with customers about their orders.
To start a conversation:
- Navigate to the Activity tab.
- Use the chat section to send messages and view communication history.
Send parts to production
Open the Production tab on the order to schedule parts into production. Each scheduled part gets its own production run (work order) with independent tracking.
To schedule one or more parts:
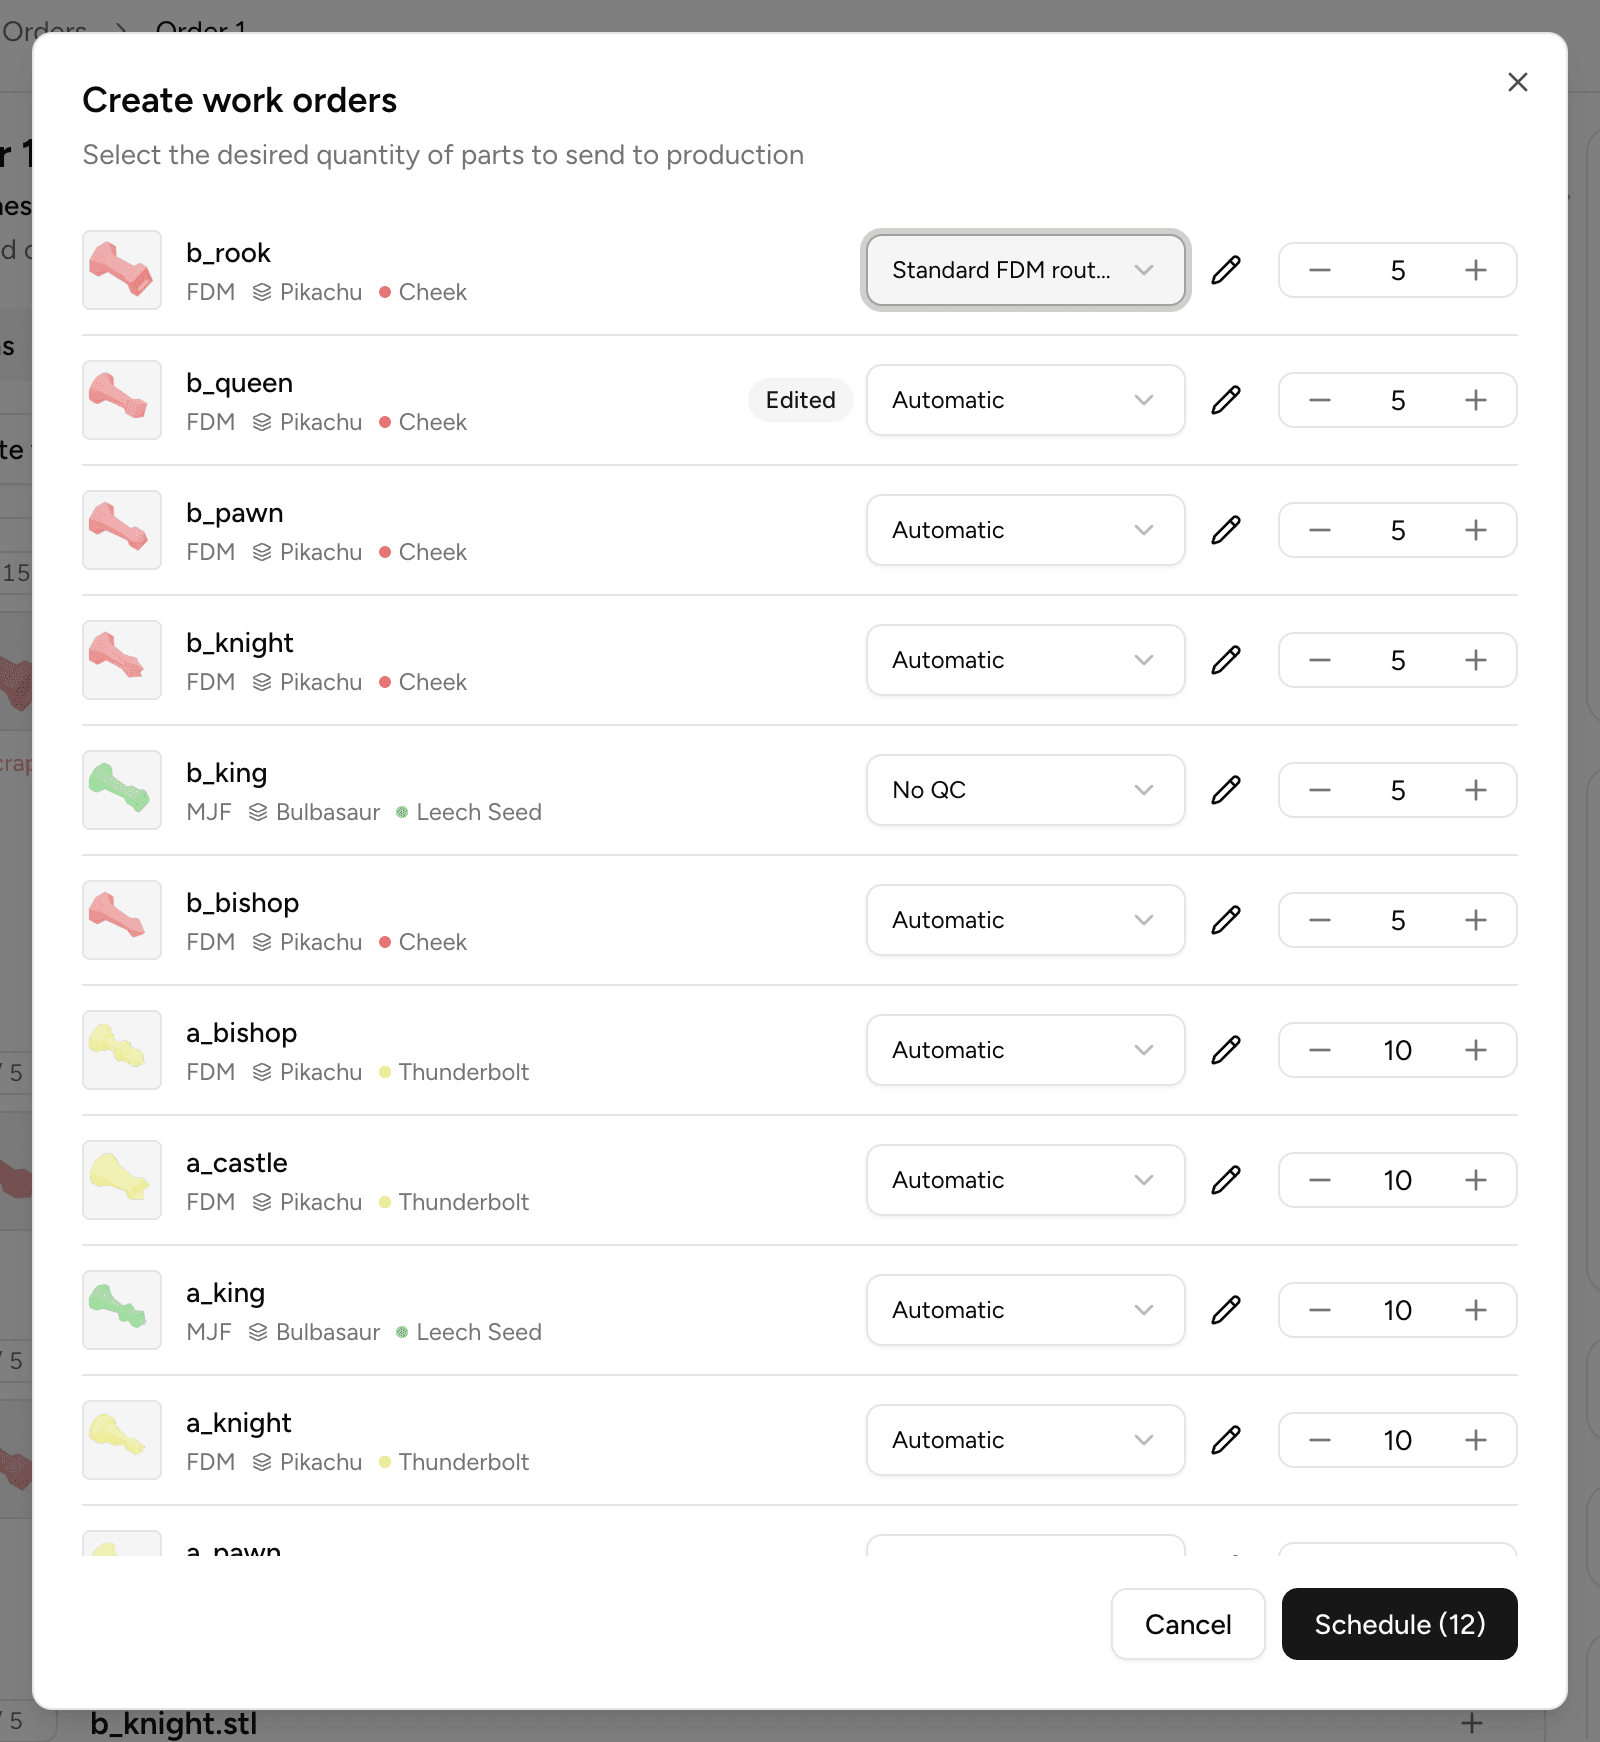
- On the Production tab, click Create work orders.
- For each part in the dialog, set the quantity to produce.
- Choose a routing template from the dropdown, or leave it on Automatic to have the routing derived from your current process configuration.
- Select Schedule to create the work orders and send parts to the first operation.
💡 If you move an order into an automation-carrying column on the Board (such as a column configured with the Schedule parts for production automation), the schedule dialog opens automatically so you can set routing and quantities before the status change is applied.
ℹ️ Automatic routing requires no setup — parts follow your current process configuration and pick up any new operations automatically. To author, approve, or designate a specific routing template, open the part specification's routing templates section. 👉 Manage routing templates
Last updated on