Workflow example: FDM printing
A reference implementation of a six-step FDM 3D printing workflow using Phasio operations.
Overview
This example demonstrates how to implement a simple FDM 3D printing workflow using operations in Phasio. The workflow covers the entire production process from initial part queuing through final post-processing and quality control, providing a practical reference for manufacturers setting up FDM production workflows.
FDM 3D printing workflow structure
This implementation creates a six-step workflow that efficiently manages FDM printing operations while maintaining clear visibility and control over each production stage, accommodating the unique requirements of filament-based printing.
Workflow sequence
The example workflow consists of six sequential operations:
- Waiting for Slicing: Initial backlog management.
- Printing: Active production with print preparation.
- Post-Printing: Essential post-production processes (part removal, support removal, etc.)
- Polishing: Optional surface finishing operations.
- Quality Control: Final inspection and validation.
- Completed: Workflow completion and order fulfilment.
Operation configuration
| Operation Name | Sequence | Group Name Prefix | Step Type | Build Constraint | Step Naming Strategy | View Type | Final Station |
|---|---|---|---|---|---|---|---|
| Waiting for Slicing | 0 | Queue | Basic | None | Always Rename | Part | False |
| Printing | 1 | Print Job | Upload Bill of Parts | Material & Color | Always Rename | Part | False |
| Post-Printing | 2 | Batch | Basic | Material & Color | Inherit Previous Name | Part | False |
| Polishing | 3 | Polish-Batch | Basic | Material & Color | Inherit Previous Name | Part | False |
| Quality Control | 4 | QC-Batch | Basic | None | Inherit Previous Name | Part | False |
| Completed | 5 | Finished | Basic | None | Always Rename | Part | True |
Operation details
Waiting for Slicing
Manages the backlog of parts that have been scheduled for production.
- Uses the Basic operation type, which has no operational effect.
- Parts are only moved out of this station—no processing occurs here.
Printing
When parts move into this operation, the Upload Bill of Parts step type allows manufacturers to download parts grouped by material and color constraints.
- After preparing the sliced print job, parts can be progressed either individually or as a group by uploading the exported file from the slicer software.
- In most cases, parts move individually, as prints typically consist of a single part—unless a full build plate is prepared.
Post-Printing
Supports post-processing steps immediately after printing.
- Parts are grouped by material and color constraints for efficient batch handling.
- Uses the Inherit Previous Name naming strategy to preserve custom job names assigned during the Printing stage.
- Maintains clear job identification through key post-printing processes like part removal from the build plate and support structure removal.
Polishing
An optional finishing operation where parts are grouped by both material and color constraints, ensuring identical finishing treatments are processed together. Using the Inherit Previous Name naming strategy maintains job identification as parts undergo surface finishing operations to improve print quality and appearance.
Quality Control
Parts moving into this operation have no grouping constraints. The Inherit Previous Name naming strategy maintains traceability by preserving job names from earlier stages during final inspection and validation.
Completed
The final stage of the workflow.
- Parts arriving here are automatically renamed with a “Finished” prefix using the Always Rename naming strategy.
- This operation is the final station, signaling completion of the production workflow.
- This station can be used to indicate storage until the entire order is prepared for shipment.
Workflow operation
Scheduling a work order
Parts enter the workflow when a work order is created from the order's Production tab.
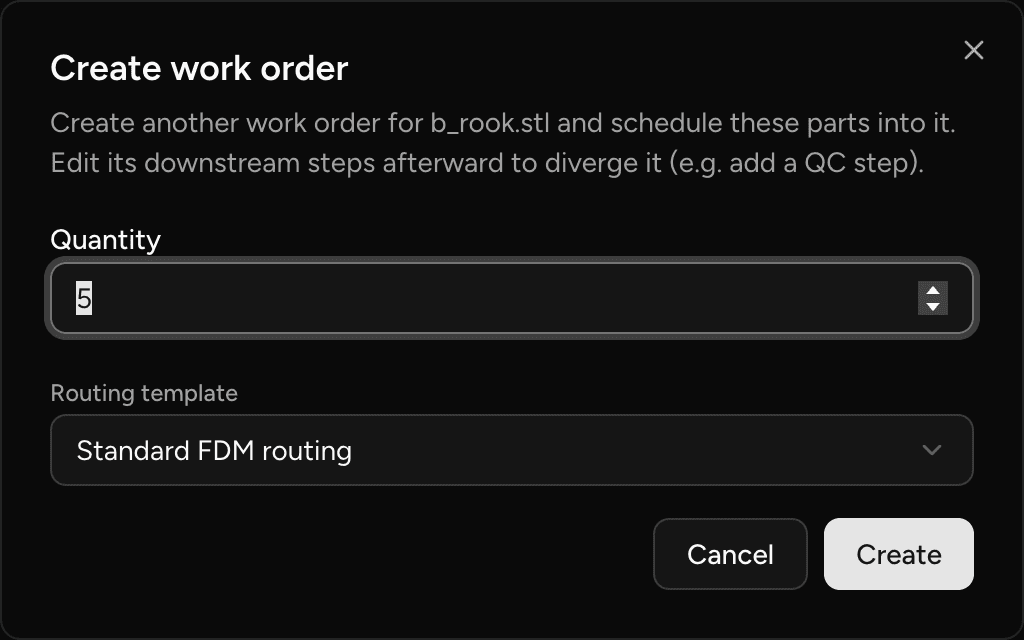
💡 If you have designated a default routing template for the part, it will be applied automatically. Without a designated template, the work order's routing is derived from your current process configuration.
Part progression and filtering
When advancing parts from one operation to the next, manufacturers can apply filters to optimize build preparation. This is especially useful for grouping parts that share identical material and colour requirements.
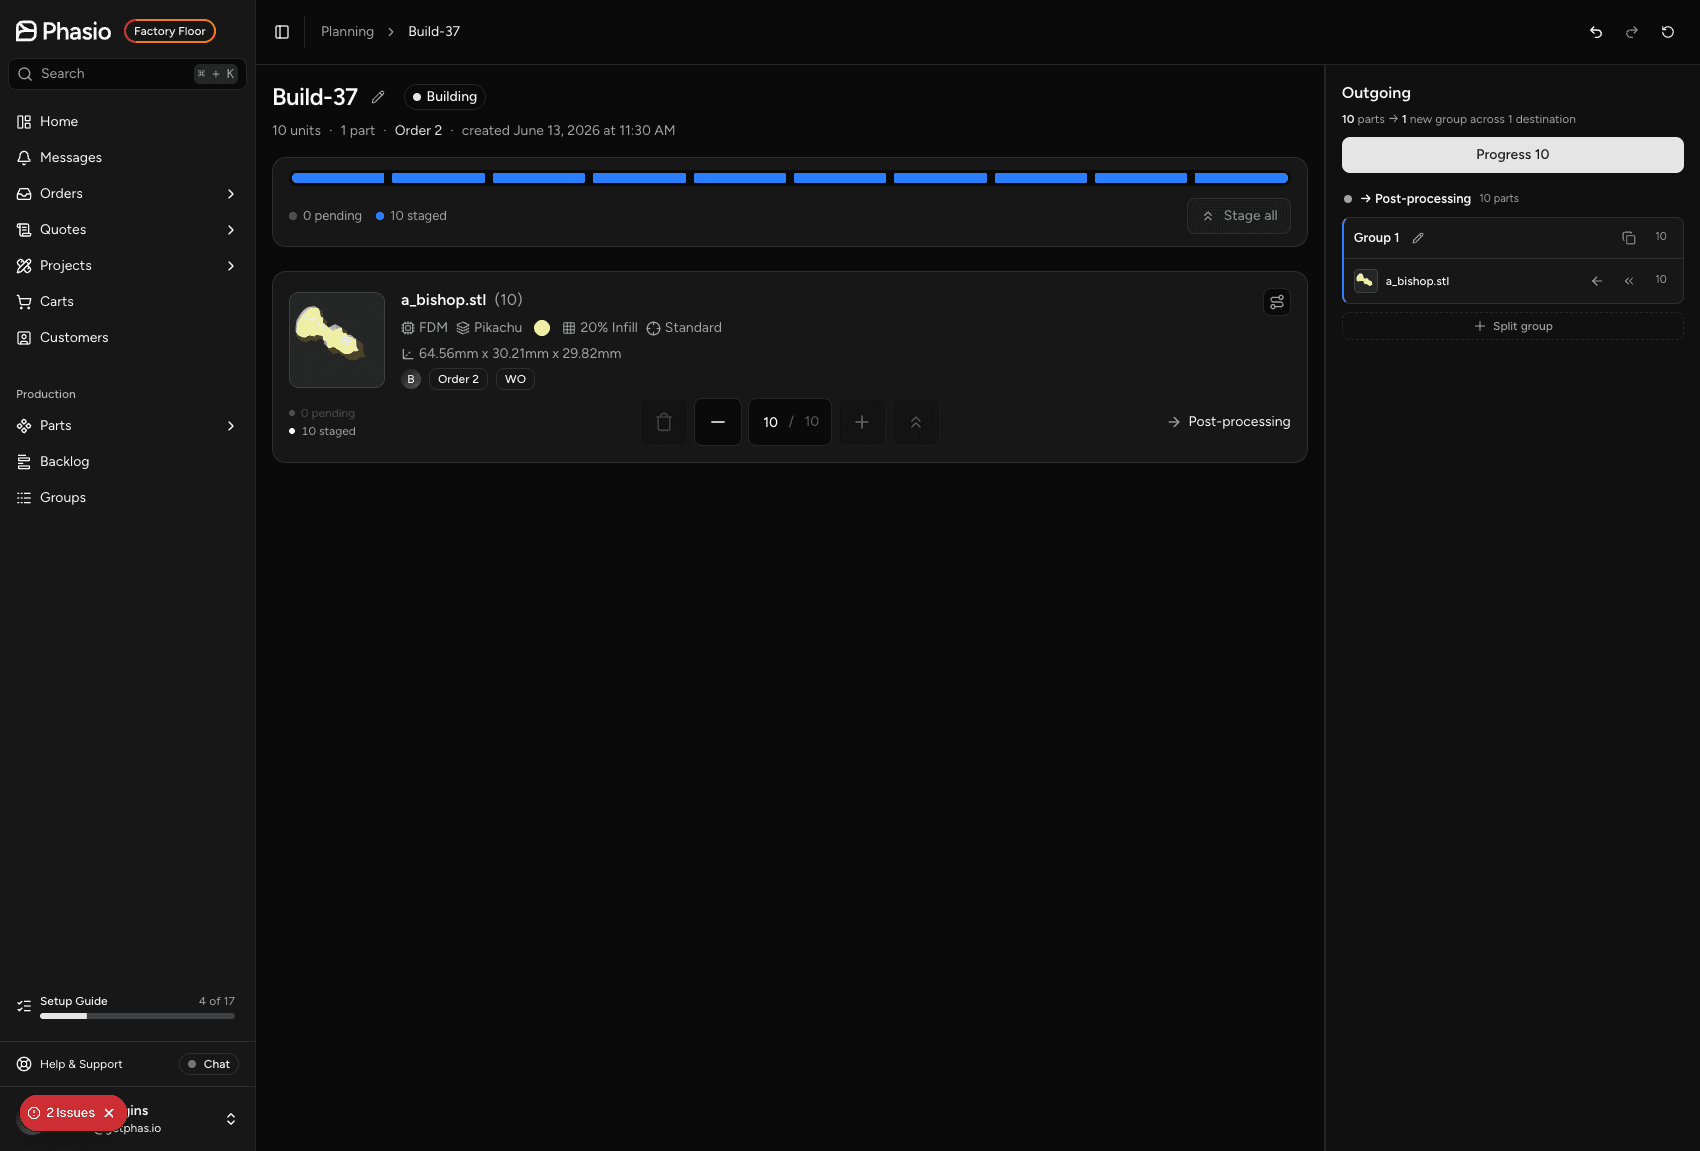
Build screen
Open an operation to access the build screen. From here, operators stage parts per destination, name the outgoing build, and commit the move with Progress.
Scrap management
At any operation, individual parts can be marked as scrapped. Provide a scrap reason for quality tracking and optionally schedule a replacement quantity — a replacement is queued automatically on the work order.
Part progression flow
- Create a work order for the part from the order's Production tab — parts land at Waiting for Slicing.
- Open the Printing operation; download parts grouped by material and color.
- Prepare the print job offline with slicer software.
- Upload the exported file to progress parts out of Printing.
- Move parts manually through Post-Printing, Polishing, and Quality Control.
- Parts reaching Completed are renamed with the "Finished" prefix.
Workflow efficiency benefits
Some advantages include:
- Material and color-based grouping minimizes filament changes and reduces setup time.
- Flexible batch processing supports both single-part and multi-part print jobs.
- Individual part tracking provides precise visibility, well-suited to FDM’s typically smaller batch sizes.
- Clear workflow visibility ensures proper handling of support removal, finishing steps, and downstream operations.
Last updated on
Workflow example: Powder bed printing
A concrete end-to-end example of a six-step powder bed 3D printing workflow, from nesting queue through final post-processing and completion.
Production Routing overview
Understand how production runs, routings, and routing templates work together to give every part its own path through your shop.