Quotes
Create quotes in Phasio or let customers request them on your Storefront, then label, edit, accept or reject them and keep their price when your pricing changes.
Available to manufacturers on Startup, Pro and Factory Floor plans
A quote is a document that shows the customer the estimated price of the goods they want to buy. Phasio automates quoting: you set up pricing equations for each manufacturing technology you offer, and customers who upload a 3D model on your Storefront get an automatically calculated quote based on the file and the options they pick. When a quote is accepted or paid, it becomes an order.
How quotes work
Quotes reach Phasio in three ways:
- Manufacturer-generated quotes: authorised members of your team create and customise quotes in Phasio. See Create a quote in Phasio.
- Customer-initiated quotes: customers upload files and submit requests through your Storefront. See How customers request quotes on your Storefront.
- AI Assistant requests: customers describe what they need to the AI Assistant on your Storefront, and the request arrives as a proposal under Projects.
A quote moves through these stages:
- Draft: a quote you are still preparing. Customers never see drafts, and drafts cannot be accepted. See Save a quote as a draft.
- Open: the quote is visible in both your dashboard and the customer's, so both sides stay aligned on progress. You can edit it while you negotiate.
- Accepted: you accept the quote, or the customer accepts or pays for it, and it converts to an order. See Accept a quote.
- Rejected: you reject the quote, and it is archived. See Reject a quote.
Each line on a quote keeps the price it was quoted at, so changing your pricing does not move quotes your customers already hold. See Keep a quote's price when pricing changes.
A quote marked Internal Only is for record-keeping rather than customer communication. It is hidden from the customer, sends them no notifications and shows an Internal only badge.
Create a quote in Phasio
Ways to create a quote
You can create a new quote using any of the following methods:
- Sidebar: Click the Create new pen icon next to search at the top of the main sidebar, then choose Quote.
- Quotes page: Go to Quotes in the main sidebar and click the + button in the top-right corner.
- Customer Details: Open the customer, go to their Quotes page and click Add Quote. This opens the quote composer for that customer, so you skip selecting a customer account.
- Projects: Open a project, go to its Quotes tab and click Create Quote. See Projects.
Select customer account
The Create Quote dialog opens. Select a customer account, then click Continue. You can also add a new customer from here. See Add a customer.
Add parts
Under the Parts section, add parts via:
- Upload Part: Import STEP, IGES, SolidWorks part files (.SLDPRT), Parasolid files (.x_t), STL, 3MF or ZIP files, or
- Library: Opens the Parts Library, which shows this customer's parts by default. You can switch it to show all parts in your account.
Available to manufacturers on Pro and Factory Floor plans
On other plans the Library button shows a lock icon.
You can also duplicate parts while preparing a quote.
Configure part specifications
Click on each individual part to define manufacturing specifications:
- Technology: Select the manufacturing process (e.g., MJF, SLA).
- Material: Specify the material composition required for production.
- Color: Select from available colors.
- Post-processing: Select finishing operations.
- Lead time: Establish delivery time expectations.
- Pricing: To set a custom price outside the default equation logic, click the Modify Pricing (calculator) icon on the part and turn on Override total price?. The price must divide evenly by the quantity.
- Production file: (Optional) To attach the file your team produces from, click the Add production file icon on the part and choose a CAD file. It is uploaded to the part's specification when you click Create or Save as draft, and replaces any production file the specification already has.
When a customer has their own pricing equation, Phasio selects it automatically on new quotes for that customer. See Customer pricing and catalogs.
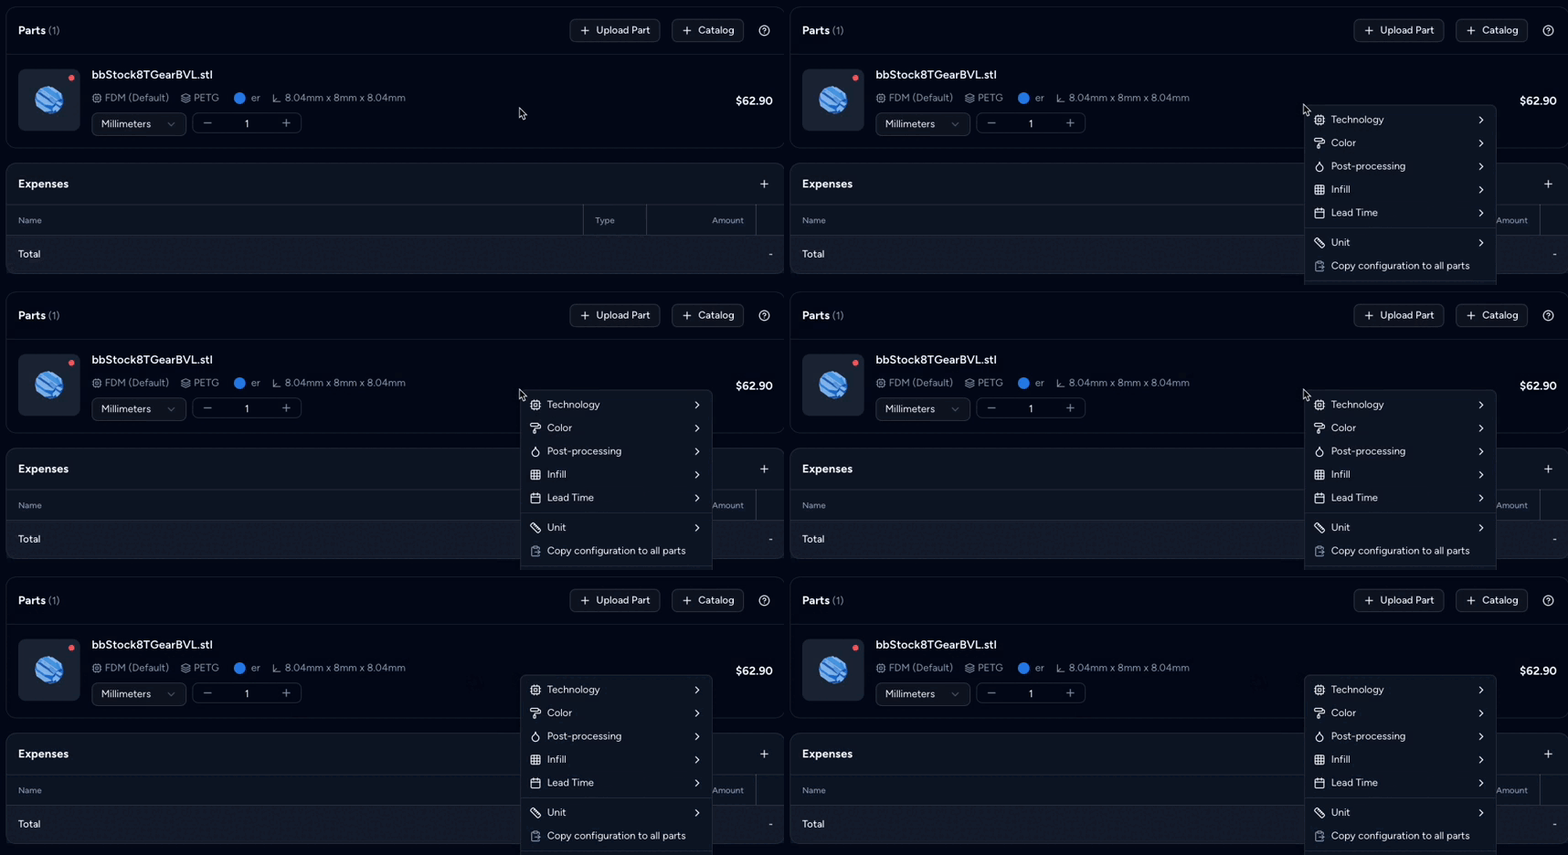
Power user tip: right-click on parts to quickly access actions.
Add supplementary charges
Add supplementary charges by clicking + under the Expenses section to account for:
- Special tooling.
- Setup costs.
- Non-standard manufacturing requirements.
See Add expenses for the fields in the Create Expense dialog.
Configure quote settings
The right-hand column holds the quote settings:
- Payment: Review the pricing and select the Payment Terms.
- Recipients: Select who will receive the quote document and notification updates via email.
- Discount: Apply a discount code.
- Reference: Enter a custom name to identify this quote in the quotes list and on the quote page.
- Notes: Add notes to the quote.
- Billing: Confirm customer billing address for accurate financial documentation and payment processing.
- Shipping: Open the Shipping section to set the shipping method, address, rate, dispatch date and Incoterm.
In the header, you can also set:
- Internal Only: Toggle if the quote is for record-keeping rather than customer communication.
- Currency: Choose the quote currency. The selector appears only when your store has more than one currency.
Generate the quote
Click Create in the top-right corner to validate inputs and generate the official quote document, completing the creation process. If a part is still analysing, failed to upload, or has no technology or material, Phasio opens Some parts won't be saved and lists them. Click Cancel to go back and fix them, or continue to save without those parts. If you added no recipients and Internal Only is off, Phasio asks you to confirm in Continue without recipients.
Once created, quotes are visible in both the manufacturer and customer dashboards, to keep both sides aligned on progress. Internal Only quotes are hidden from the customer and send them no notifications.
Save a quote as a draft
To prepare a quote before the customer sees it, click Save as draft instead of Create. This button appears only on new quotes.
A draft has the Draft state. Customers never see drafts, and drafts cannot be accepted. When the draft is ready, open it, click ··· (More actions) in the top-right corner and select Send to customer. For an Internal Only draft, or while Send customer notifications from Phasio is off, the option is Convert to quote because the customer is not notified.
How customers request quotes on your Storefront
Customers can request a quote on your Storefront in three quick steps:
- Upload a model.
- Set part requirements: pick the technology, material, color, and any specific options.
- Proceed to checkout: pay online, save the quote, or submit it for review.
After submitting, customers find their quotes on the Quotes page of their account menu, where they can track progress and message you directly.
Before you start
- Your Storefront must be set up and published so customers can access it.
- Make your Storefront accessible by sharing the URL with customers or embedding it on your website.
Upload a model
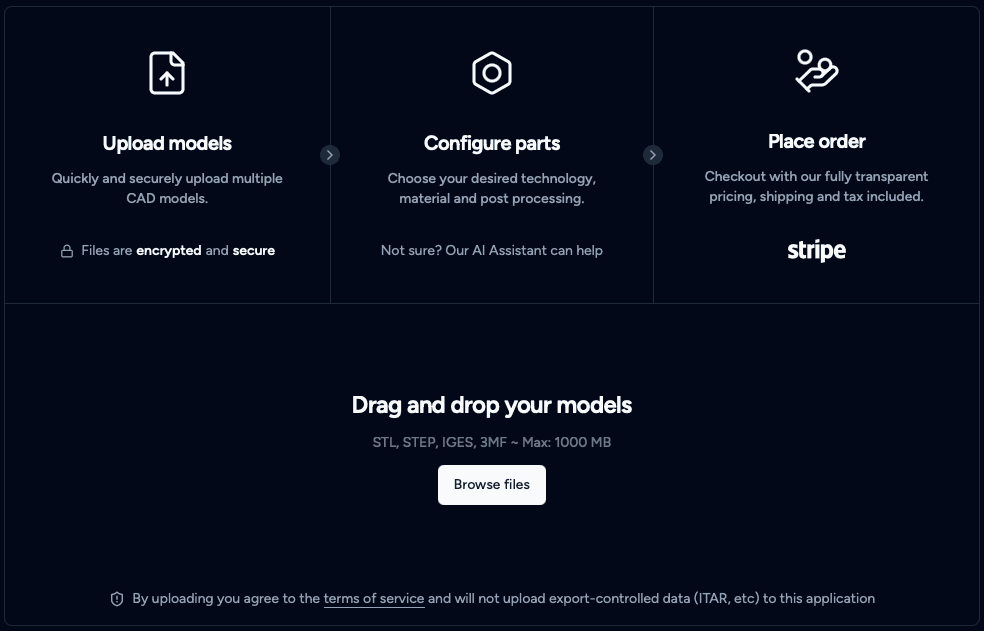
Customers upload a model by clicking Browse Files or by dragging and dropping the file into the upload section.
- Supported formats: STEP, IGES, SolidWorks part files (.SLDPRT), Parasolid files (.x_t), STL, 3MF and ZIP.
- Multiple models: customers can upload several models in a single quote.
Set part requirements
Customers choose a part and define its manufacturing specifications:
- Technology: Select the manufacturing process.
- Material: Specify the material composition.
- Color: (Optional) Select from available colors.
- Infill: (Optional) Select the percentage infill.
- Layer Height: (Optional) Select the desired layer height.
- Post-processing: (Optional) Select finishing operations.
- Lead time: (Optional) Select delivery time expectations.
Then they select the part to set its quantity:
- Adjust Quantity: Use the + and − buttons to update the amount.
- Bulk pricing: Hover to view and select from your pre-set quantity tiers.
- Apply to All: Copy current specifications to all other parts.
Power user tip: customers can use Ctrl+Click to select multiple parts for bulk changes.
Clicking a part thumbnail in the cart or on the review screen opens an interactive 3D viewer with commenting, so customers can inspect a part without leaving the page.
The final price may vary based on the selected options and your pricing settings.
Proceed to checkout
When the part configuration is done, customers open the review page. Depending on the parts and your pricing, the review page offers one of these flows:
- Select delivery method and make payment: Standard checkout with upfront delivery and payment. This is available when every part can be bought now.
- Submit for review: The cart cannot be bought now, for example because a part needs a price review, is not watertight, or fails a manufacturing constraint. The customer submits the quote for you to evaluate. See Review-required pricing.
- Save the quote: When every part can be bought now, customers can also save the quote and download it as a PDF for offline processing.
The review page also shows the estimated dispatch date before the order is placed.
Submitting the quote makes it visible to both the customer and you. You can review, accept, reject, or follow up as needed. While a quote is awaiting your review, the customer's quote list shows Review required instead of a price until you approve it.
Pay for the quote
- After finalising the part configuration, the customer clicks the review button at the bottom of the configure screen.
- On the review page, they select a billing address. They can add a new address there. If you have enabled Tax ID and require a billing address, the billing address must have a tax ID. Until it has one, the review page shows a warning and the quote cannot be checked out, saved or submitted.
- They select a delivery method.
- (Optional) They apply a discount code.
- If they are not signed in, they sign in on the review panel.
- They review the final summary, including the parts, quote breakdown and total amount.
- They click the checkout button to open the payment page.
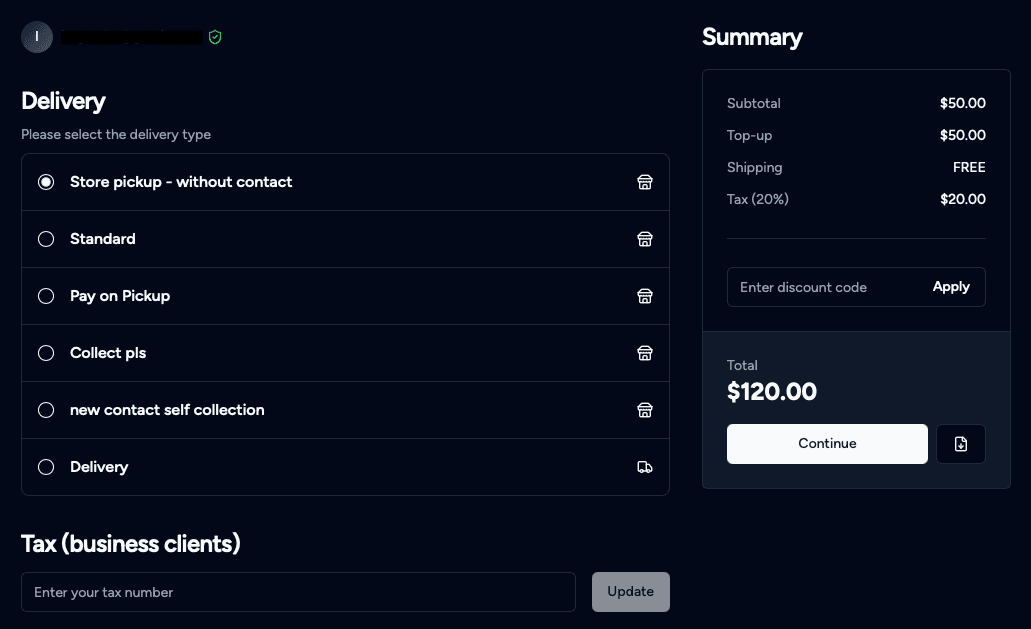
Depending on your payment settings, customers may see:
- Digital or manual payment options. See Payments for the supported payment types.
- Download invoice button. Lets customers save a PDF copy of the invoice. See Templates to customise your invoice template.
Submit for review
- After configuring the quote, the customer opens the review page.
- If they are not signed in, they sign in on the review panel. They choose a sign-in channel (email, WhatsApp or SMS, depending on the store), enter their contact details, then enter their password or a one-time code.
- They click the submit for review button. The quote is saved and sent to you.
Save the quote and download a PDF
For estimates or quotes that need internal review on the customer's side:
- The customer finalises the part configuration and opens the review page.
- They click the save quote button. The quote is saved and a PDF copy of the estimate downloads.
Submit a Custom RFQ without a model
If a customer doesn't have a model file ready, they can still reach out to you to collaborate on a project. They select Custom RFQ to submit a manual request and begin the conversation. The request arrives as a proposal under Projects.

Open carts
Customers' carts are persistent and tied to their account. When a customer returns to your Storefront, their open carts are listed so they can resume where they left off, including all process, material, lead time and post-processing selections. Each cart tracks its lifecycle from open through to order conversion.
Each new cart gets the next number in your account's cart sequence, so carts are easy to reference in external systems such as an ERP or a support ticket. The Carts page lists carts with each cart's contact and the date it was created, and search matches the cart number, the customer's email and name, their organisation and part names. To see what one customer is working on, open the Carts tab on their customer page. See Customers.
Manage quotes
Manage all customer quotes from a central dashboard: go to Quotes in the main sidebar to open your complete quotes list, then organise, filter and process quotes to stay on top of incoming requests. The number column is headed Quote No.
Label quotes
Labels show your team at a glance where each quote stands, for example Hot lead or Needs review.
- Set up labels under Settings > Workspace > Labels. Each label has a name and a colour.
- On the Quotes page, use the Labels column to add labels to a quote, or create a new label in place.
- Filter and sort the quotes list by label.
Labels stay on a quote when it becomes an order. Customers never see them.
Accept a quote
Review each quote carefully before proceeding. Once you're confident the details are accurate and ready for production:
- Open the quote.
- Click Accept in the top-right corner.
- In the Accept Quote dialog, you can enter a PO Number, a Message for the customer, a Purchase Order PDF and a Conversion date, the date the quote became an order, which can't be in the future. All four are optional.
- Click Accept to confirm.
The quote converts to an order and the customer receives an acceptance notification. You can correct the placed date later from the Converted on field in the order sidebar. See Orders.
Drafts cannot be accepted. Send the draft to the customer first. See Save a quote as a draft.
Customers can also accept a quote on your Storefront. When a customer submits a purchase order number on a quote, Phasio asks them to confirm and then converts the quote to an order. After a quote has been converted into an unpaid order, the customer can still complete an online payment.
Ensure payment is received before proceeding with production.
Approve a quote that cannot be purchased
If parts in a quote fail a purchasability check, for example because they need a price review, the Parts card shows the failed checks. To let the customer buy the quote anyway, click Approve for Purchase. This bypasses every purchasability check for the whole quote. See Review-required pricing.
Reject a quote
If you're unable to proceed with a quote, due to feasibility, missing details, or other reasons, you can reject it.
- Open the quote.
- Click Reject in the top-right corner.
- Enter a customer message.
- Click Reject to confirm.
The quote is archived, and the customer is notified of the rejection.
Edit a quote
To edit a quote, open the quote, click ··· (More actions) in the top-right corner and select Edit. In the quotes list, you can also right-click the quote and select Edit quote.
Update quote details during customer negotiations. Phasio allows these changes:
- Add parts: Click Upload Part to include new files in the quote.
- Edit specifications: Click on a part to update technology, material, color, and post-processing parameters.
- Change pricing: Click the Modify Pricing (calculator) icon on the part, turn on Override total price?, and enter a custom price.
- Delete parts: Right-click on the part and select Delete.
- Shipping method: Open the Shipping section and select your preferred option from the dropdown. See Shipping for shipping configuration.
- Expenses: Click + in the Expenses section. See Add expenses.
Power user tip: right-click on any part to quickly access and modify specifications.
Editing keeps each part's identity, comments and files. A quote keeps the price it was quoted at when your pricing changes. To move its lines onto your latest pricing while editing, see Update a quote to your latest pricing. On the Factory Floor plan with the Scheduling add-on, the If accepted now panel shows the day the parts would be ready and any other work that would slip. See Scheduling.
Click Save in the top-right corner to finalise updates. If a part is still analysing, failed to upload, or has no technology or material, Phasio opens Some parts won't be saved and lists them. Click Cancel to go back and fix them, or continue to save without those parts.
Add expenses
To add additional expenses to a quote, click + in the Expenses section. The Create Expense dialog opens:
- Name: Charge description.
- Description: (Optional) Charge details.
- Type: Select Fixed Price or Hourly Rate.
- Fixed Price: Enter the Quantity, the Unit Price and the Operator cost (total).
- Hourly Rate: Enter the Hours and the Hourly Rate.
- Accounting category: Appears only when a connected QuickBooks or Xero account has categories. The default is Default (uncategorised).
Click Continue to add the expense.
Let customers remove quote lines
You can let customers remove line items from an open quote themselves. Turn on Line Item Removal in the Features section of Settings > Workspace > General. See Storefront.
The quote is repriced after each removal and you are notified. Customers can only remove eligible lines: the quote always keeps at least one line, and assembly relationships are protected.
Delete or hide a quote
- To delete a quote, reject it. This removes the quote from your active workflow and archives it in the system.
- To hide a quote from the customer without rejecting it:
- Open the quote, click ··· (More actions) and select Edit.
- Toggle Internal Only in the top-right corner.
This hides the quote from the customer's dashboard and stops any related notifications, while keeping it visible internally for your records.
Duplicate a quote or add it to a project
Open the quote and click ··· (More actions) in the top-right corner:
- Duplicate: Creates a copy of the quote and opens it. On an order, this option is Duplicate as Quote.
- Add to Project: Adds the quote to a new or existing project. This option appears only when the quote is not in a project yet. See Projects.
Keep a quote's price when pricing changes
Each line on a quote keeps the price it was quoted at, along with the pricing equation version, the material price and the settings that priced it: precision, infill, bounding box limit, lead time and workflow times. When you edit any of these, the change reaches new quotes, parts added to a quote, revised parts and lines you update. It does not move the price on a quote your customer already holds.
See which lines use older pricing
On a quote, a line priced with something that has since changed shows an orange Older pricing marker. Hover over it, or click it, to see what changed, for example:
- Process: This part is priced with an older pricing equation (v3; latest is v5).
- Material: This part is priced with this material's price from before it changed on Oct 28.
- Lead time: This part is priced with an older lead time (24 h; latest is 48 h).
Click a name to open the setting it refers to. If the order-level pricing equation changed, the marker shows above the quote's price breakdown.
A line on your latest pricing shows a blue Latest pricing dot.
Update a quote to your latest pricing
- Open the quote and click Edit.
- On a line marked Older pricing, click Update to latest pricing. To update every line and the order pricing at once, click Update all to latest pricing above the parts.
- The line shows Updates on save, and the running total shows the new prices. Click Undo pricing update to keep the old price.
- Click Save.
The quote's activity records Updated to latest pricing. Your customer is not notified; they see the new price on the quote and at checkout. Saving updates the estimate in your accounting system and sends the Order Updated webhook, as any quote edit does.
A quote keeps its price until you update it. Quotes that were already open when this was released keep that day's pricing equation and material prices, while their other settings, such as lead time, precision and infill, follow your latest pricing. Of those, a quote with an assembly follows your latest pricing for everything. On a quote with an assembly created since then, the assembly's lines keep their equation version but follow your latest material prices and settings. No quote with an assembly can be updated to your latest pricing.
What is not held
Some inputs are always read live, so they can still change a quote's price:
- Catalogue fixed prices.
- Tax and exchange rates.
- Customer details a pricing equation reads, such as tax exemption or approval.
- Lines on a process that is not priced by a pricing equation.
These are applied whenever the whole quote is re-priced, which happens when you save an edit, add a discount, or change shipping or an expense.
The lead time a line was priced with keeps its price, but the quote's dispatch date follows your current lead time and workflow settings.
Pricing equations keep a version history, so you can see which version priced a line. See Pricing equations.
Last updated on
Order statuses
Order statuses are the stages an order moves through, each a column on the Orders board that can notify the customer or send documents.
Customers
Add customer organisations and contacts, keep their details, addresses and metadata up to date, and see each customer's quotes, orders, projects and carts in one place.