Specifications
View and manage part specifications: the manufacturing recipe for a part revision, with its customer references, constraints, production instructions, files and properties.
Available to manufacturers on Pro and Factory Floor plans

Video tutorial
Part Intelligence
Watch on YouTube
A specification is the complete manufacturing recipe for a part revision: the process, material, colour, precision, infill, post-processing, quality requirements and constraints it is made with. Phasio stores a specification for every part ordered through Phasio, so the next time the part is ordered, everything about how you made it is already there. A revision can have several specifications, for example the same part in two materials. How specifications relate to part designs and revisions is described in Parts.
The specification is also where you keep what production needs to know about the part: the customers who order it and their part numbers, manufacturing constraints, production instructions, a print-ready production file, routing templates, attachments and your own properties.
View part specifications
- Navigate to Production > Parts > Specifications on the sidebar menu.
- A table of all parts and their specifications is shown, including the Created and Last Updated dates.
- Click a part to open the specification page.
- The specification page shows these sections from top to bottom:
- The part revision name, with a View Revision button.
- A 3D view of the part, with its dimensions and volumes.
- Manufacturing specifications: units, process, material, colour, precision, infill and post-processing.
- Orders and quotes
- Customers
- Manufacturing Constraints
- Routing Templates and Production instructions (Factory Floor plan)
- Production file
- Attachments and Properties
Customer references
A customer reference links a customer organisation to a part specification, usually with the customer's own part number. It is a shortcut to a part revision with a specification, for fast reordering and to power B2B sales: you can keep track of part manufacturing information for each customer, set customer-specific prices, and show the part in that customer's catalogue. A specification can have several customer references.
Add a customer reference
- On the specification page, click + in the Customers section.
- In the Add Customer Reference dialog, enter the following details:
- Reference: the customer's part number or reference.
- Customer Organisation: the customer organisation this reference is for.
- Pricing Tiers: optionally, add tiers with a Min Qty and a Price. When this customer orders the part, Phasio uses the unit price of the highest tier whose minimum quantity the order meets, instead of the auto-quote.
- Show in catalog?: whether to show this part in the customer-specific catalogue.
- Click Add Reference.
Each reference in the list shows In Catalog when the part is in the customer's catalogue, and either the number of pricing tiers or Auto-quoted. Use the ··· menu on a reference to Edit or Delete it.
View customer orders
- On the specification page, scroll to the Orders and quotes section.
- The section lists the orders and quotes that include this part. Each row shows the order number, the quantity, the price, how long ago the order was created, and the customer. Hover over the price to see whether it was auto-quoted or manually quoted. Older orders are collapsed.
- Click an order to view its details.
Add manufacturing constraints
Manufacturing constraints keep a record of how a part must be made, so the information is there whenever you manufacture the same part again.
- On the specification page, click + in the Manufacturing Constraints section.
- In the Add Manufacturing Constraint dialog, select the Constraint Type:
- Fixed Orientation: locks the orientation of the part during manufacturing. Set the orientation in the 3D viewer.
- Click Add Constraint.
Use the ··· menu on a constraint to View or Delete it.
Add production instructions
Available to manufacturers on the Factory Floor plan
Production instructions are internal notes for the operators who make the part, such as "Place upright only", so a repeat order arrives with its setup notes already attached. Customers never see them, and they never appear on customer documents. Operators see them wherever they plan and build the part: on the part in the Backlog, on the progress screen, in the Download Files dialog, and on the build screen. Traveller templates can print them too.
- On the specification page, scroll to the Production instructions section.
- Click Add instruction.
- In the Add Instruction dialog, enter the following details:
- Instruction: the text of the instruction, up to 2000 characters.
- Operation: All operations, or one operation. An instruction for one operation is listed first at that operation. Other operations show it muted, under the other steps.
- Click Add Instruction.
Use the icons on an instruction to Move up, Move down, Edit or Delete it. The order you set is the order operators see.
Upload a production file
The production file is the print-ready file that production downloads instead of the original CAD file, for example a repaired or pre-oriented .3mf. It is internal and never shown to customers. The production file does not need the Factory Floor plan.
- On the specification page, scroll to the Production file section.
- Click Upload production file and choose a CAD file, such as
.stl,.stepor.3mf.
You can also upload a production file while quoting, on the new quote and new order screens.
The section then shows the file name, its format and who uploaded it. Use the icons next to the file to download, replace or remove it. When you remove it, production downloads the original file again.
A specification with a production file shows a green Production file icon next to the part on order rows and in the Backlog. Hover over it to see the file name. When you download parts from the Backlog or the build screen, the Production file choice uses this file, and falls back to the original CAD file for parts that have none. ZIP and CAMSPEC downloads work the same way. See Download parts.
Attachments
A specification can hold its own files, so files that belong to the part, such as G-code or images, stay with the specification instead of in separate folders.
- Upload files of up to 25 MB on the specification page.
- Preview images and text files, such as G-code, in place.
- See who uploaded each file and when.
The production file is kept separately from attachments.
Properties
The Properties section stores your own key and value pairs on a specification, such as an ERP article number. Use it to keep integration identifiers with the specification they belong to instead of in a spreadsheet.
- Integrations can read and write the same properties through the Manufacturer API, where they are the specification's metadata.
- Document templates can read them on every document type with part lines, for example
part.metadata['ERP no']. See Document templates.
Routing templates
Available to manufacturers on the Factory Floor plan
The Routing Templates section lists the routing templates for the part. A routing template is a saved, reusable sequence of operations: the routing a work order for this part follows through your shop. From this section you can create, approve, set a default for, deprecate and delete templates. A template that a work order has used can no longer be edited or deleted.
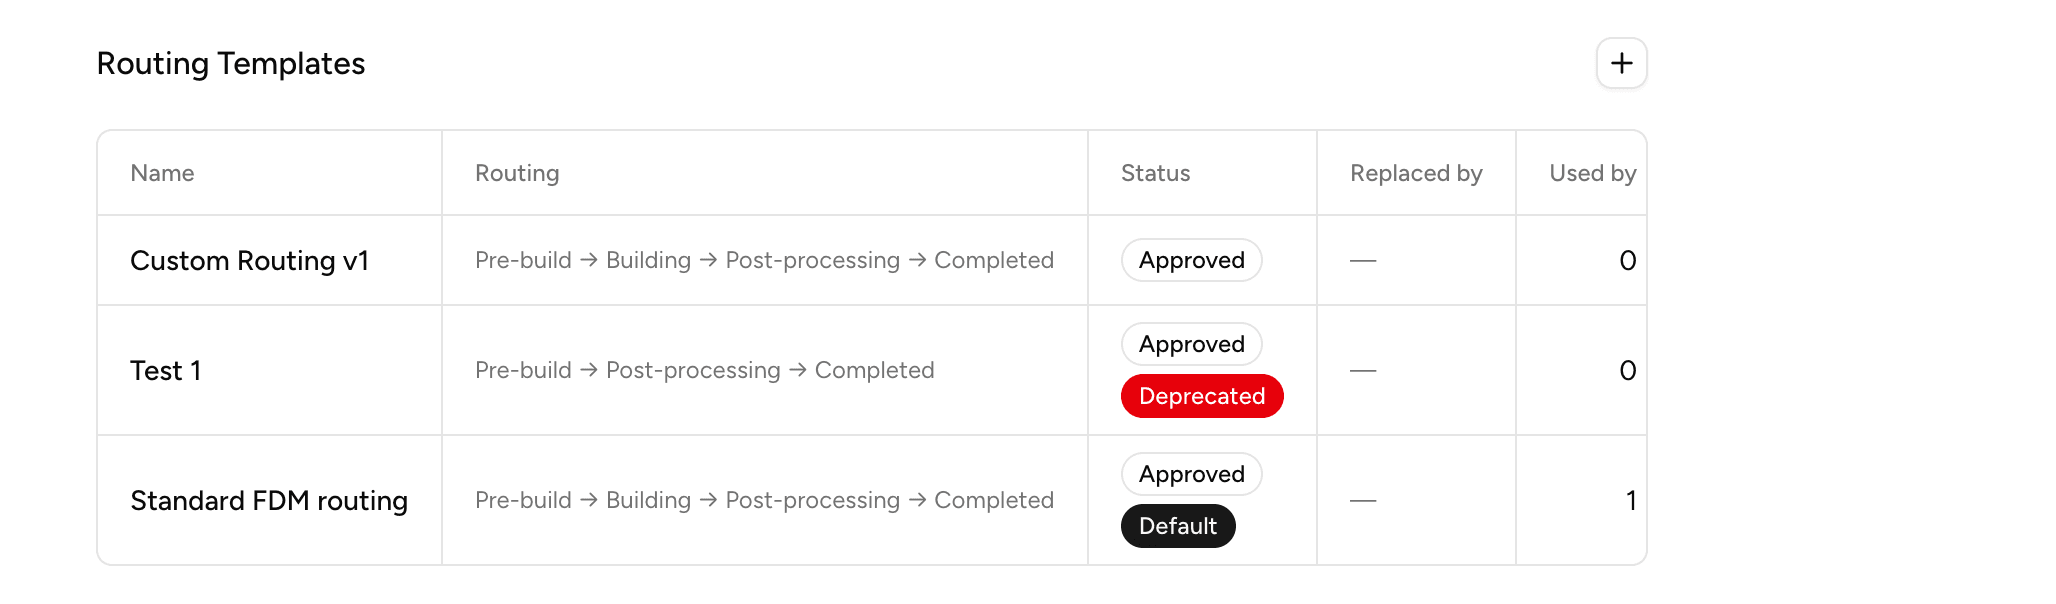
How to create and manage templates is described in Routing templates.
Last updated on